Installation preparation
Some things that you should note before starting the installation are:
1. prepare the PC which allows to install linux
2. prepare a Linux installation CD that you want to install
Getting Started Installation
1. BIOS settings on the computer, in order to boot first from the CD-Drive.
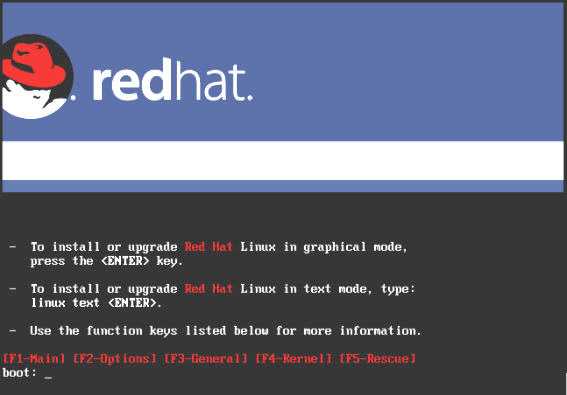
2. Insert Disk 1 of 3 to Red Hat CD into the CD-Drive. Wait some time to appear instalatasi option to start the Red Hat | press the Enter key.
3. Wait a few moments to appear choice of language during the installation process as shown below:

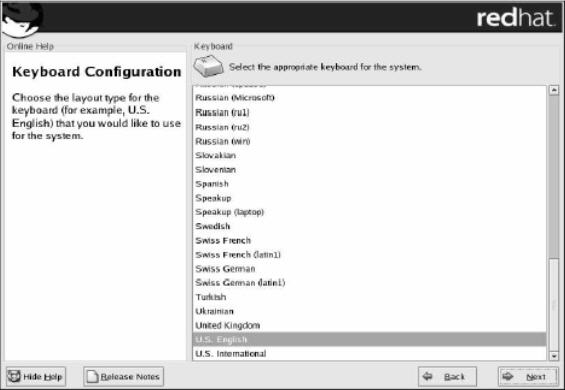
4. Click the Next button. Then a window will appear for the keyboard option.
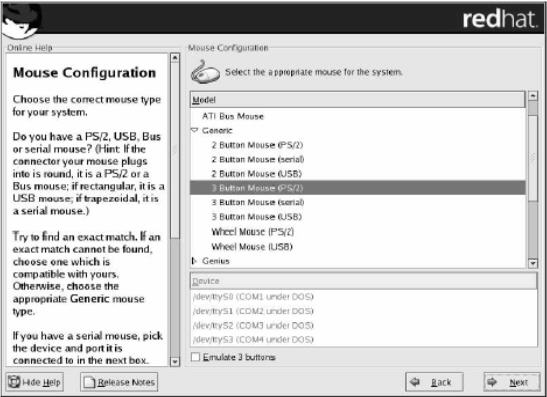
5. Click the Next button. Then will appear the window option for the mouse, click the mouse according to the use.
6. Click the Next button. Then will appear the window option to upgrade or install

7. Select Perform a New Red Hat Linux Installation, then click the Next button.
8. Determine the desired installation option, click Next
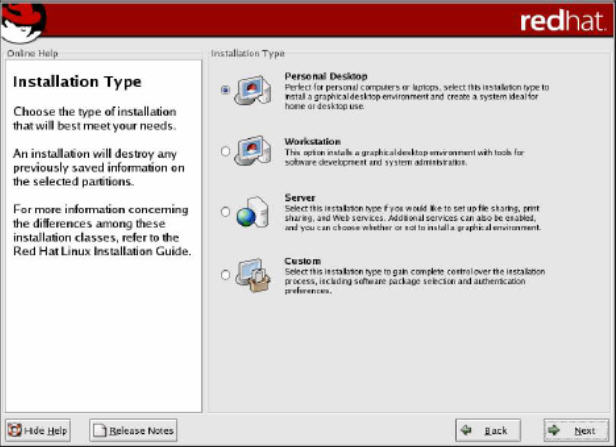
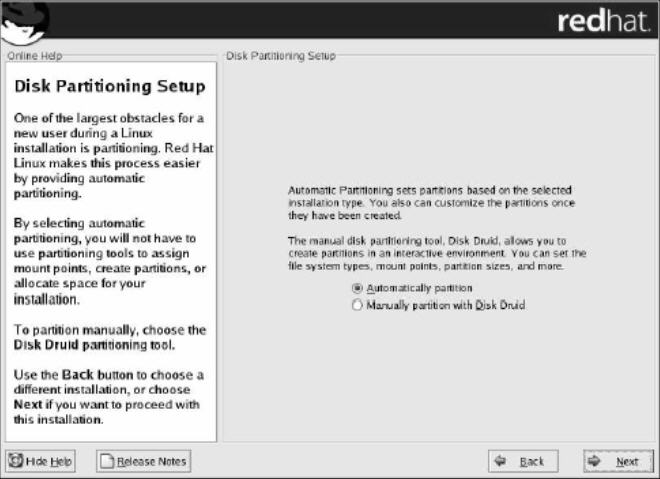
1 Personal Desktop offices and Multimedia Applications 1.8 GB9. Select the desired form of partition: Partition Automatically or Manually Partition with Disk Druid
2 Workstation Computers and networks working for developer / programmer. 2.1 GB
3 Server computer as an application server with 1.5 GB - 4.85 GB
4 Determine your own Custom packages to suit the needs of 500 MB - 4.85 GB
*) Create three partitions, each for windows, linux and data. So if you want to remove / uninstall Linux or Windows, your important data is not lost participate.
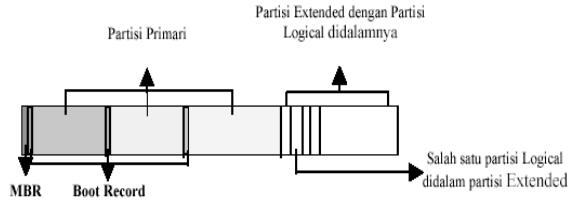
*) In a hard drive partition that contained concept consists of a Primary Partition, Extended Partition and Logical Partition. Contained within the primary partition Master Boot Record (MBR) to perform the boot loader of the operating system.
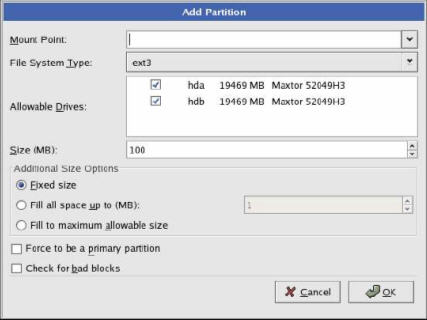
10. Select Manually Partition with Disk Druid to create a Linux partition, and by default, you are enough to create a partition:
1. / boot ----> EXT3 / Linux Native ---> 100 MB
2. / -----> EXT3 / Linux Native ---> 4000 MB
3. swap ----> Swap -----> 2 x the amount of memory installed on the computer
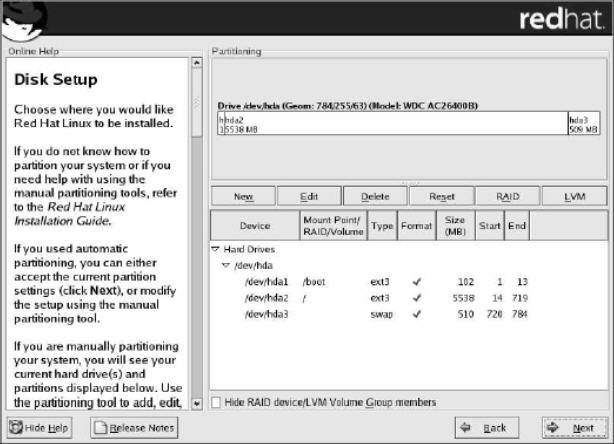
Select the NEW button on the dialog box Partitioning. Then fill in the columns Mount Point "/". For the file system, select Linux Native. Fill the rest of the column size of your hard drive is still empty. Then select OK and then select Next.
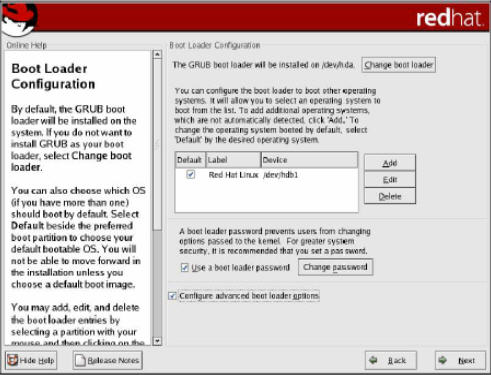
11. After partitioning is complete it will display configured to boot loader then select Next, so the display appears as follows:
12. If you plan to connect the computer to the network, fill in the requested data. If not leave blank. Select Next.

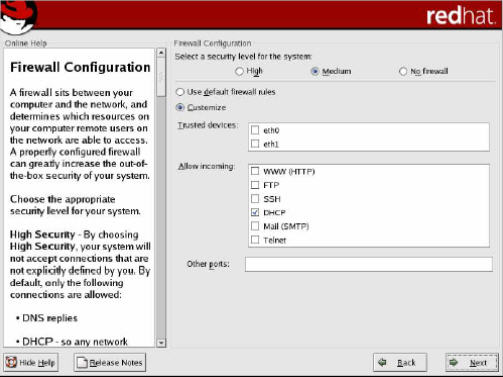
13. Then came the box firewall configurations. Leave it empty if you do not connect the computer to the network.
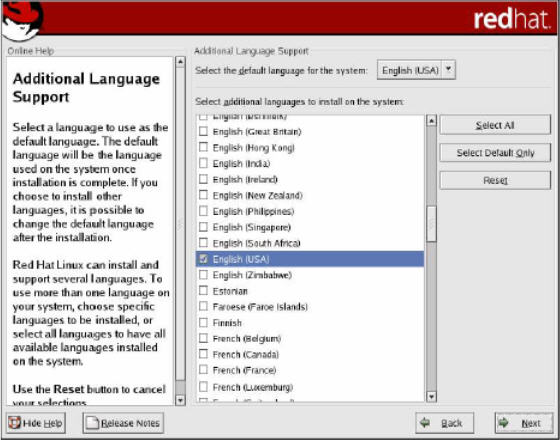
14. Select Next, the following display appears asking you to fill in the type of language that will be used by RedHat later.
Sell Links On Your Site
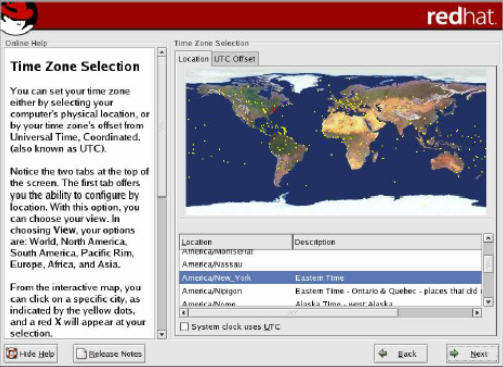
15. Select Next to continue. So it appears the setting time.
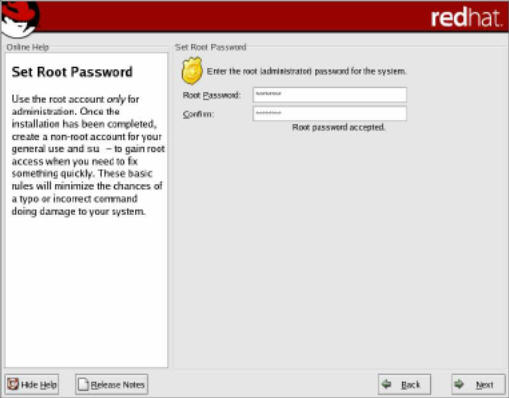
16. Select Next to continue. Enter the password for the root, which is the super user. Click the Next button and the Next button again.
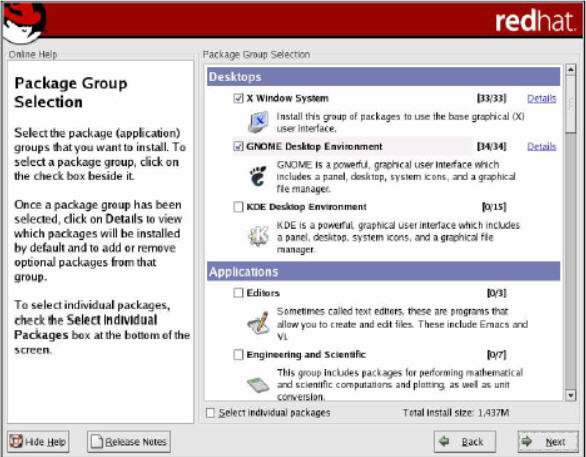
17. Determine what packages are going on Install. There are several group packages such as Desktop, Application, Server. Then click Next
18. Wait a few moments until the installation process packages have been completed everything.

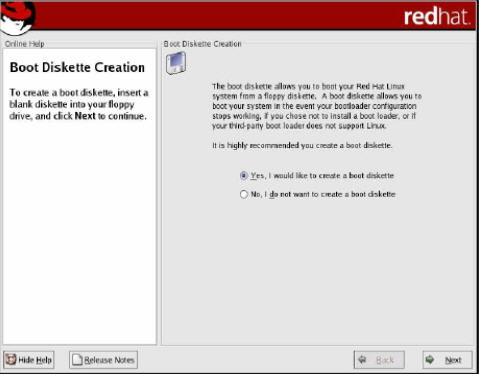
19. Then will appear the dialog box to make the system boot to a floppy disk, insert the floppy disk in drive A, then click the Next button.
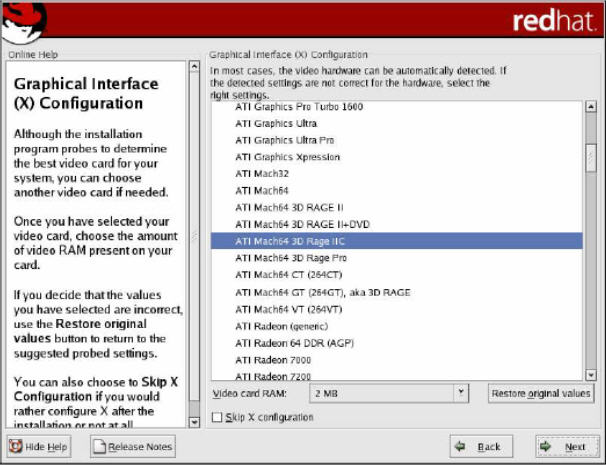
20. After completion of the boot disk creation, then will appear the dialog box to specify the type Next the installer will ask you to choose the configuration Video Card. Generally, the installer identify the type of video card available. And you are also asked to choose the amount of RAM the video card. As shown in the following figure:
21. Click Next to specify the type of monitor used and the desired resolution.
22. Once you enter it correctly, then it's done installing RedHat Linux 9.0.
You have just read an article that categorized Component of Computer /
Installation /
Windows Tips
by title "22 Steps How to Install Linux RedHat (Full Figure)". You can bookmark this page with a URL http://de-computer-tips.blogspot.com/2013/11/22-steps-how-to-install-linux-redhat.html.


